
A sound tenant onboarding process ends with the tenant moved in, every statutory document signed and lodged, the property's condition recorded in detail, and rent payment arrangements confirmed. Four key actions sit at the centre of it: lawful screening, a compliant lease with the required notices, bond collection and lodgement, and a signed condition report. Get those four right and everything else, from keys to routine inspections, falls into place.
TL;DR:
- Consistent screening limits requests to two identity and two income-related documents to ensure compliance and avoid discrimination complaints.
- All paperwork, including lease agreements, notices, condition reports, and guides, must be signed, dated, and kept in a central file to protect against disputes.
- Proper completion of the move-in condition report with detailed photographs and tenant signatures is crucial for bond claims and dispute prevention.
- Bond lodgement must happen within statutory timeframes with confirmed online proof to support the property's condition at move-in.
- Establishing a clear, organized, and full documentation process is the most effective way to reduce risks and prepare a portfolio for SACAT.
Table of Contents
- What are the steps in tenant onboarding?
- How do you screen tenants and check applications properly?
- What lease and compliance paperwork do you need at signing?
- How do you complete the condition report at move-in?
- How much is the bond and how do you lodge it?
- What safety checks and appliance instructions are required?
- What happens on move-in day?
- How do you handle communication and inspections after move-in?
- HOSO perspective: SACAT-ready onboarding practices
- Why onboarding quality protects the whole portfolio
- How HOSO Real Estate handles onboarding and compliance for you
- Sources
What are the steps in tenant onboarding?
A tenant onboarding checklist works best as a sequence tied to real deadlines, not a loose pile of tasks. Here's the order that keeps a South Australian tenancy legally sound from approval to first inspection.
- Finish property preparation before you advertise. Fix known defects, test safety devices, and photograph the property empty so your baseline evidence exists before anyone applies.
- Screen every applicant against the same criteria. Run identity, income, and rental history checks consistently, and keep notes on why you accepted or declined each application.
- Approve the applicant and confirm the lease terms. Agree rent, start date, and any special conditions in writing before drafting the lease.
- Issue the lease for signing, alongside the Section 48 notice and the Tenant Information Guide. These aren't optional add ons. Under Residential Tenancies Act 1995 s48, landlords must provide written notice of landlord or agent contact details before or at the start of the tenancy.
- Collect the bond and lodge it with the commissioner within statutory timeframes. Keep the lodgement confirmation as part of your tenancy file.
- Complete the condition report at, or before, move-in. Walk the property with the tenant where possible and photograph every room, fixture, and appliance.
- Confirm utility and meter arrangements. Tell the tenant which utilities they connect themselves and flag any embedded network or shared metering setup.
- Hand over keys, remotes, and welcome information on move-in day. Include emergency contacts and maintenance reporting details.
- Follow up within the first week. Check the tenant has settled, confirm utilities are connected, and resolve minor snags before they become disputes.
- Schedule the first routine inspection. Most SA landlords run this around six to eight weeks in, then quarterly after that.
Before approval, your only job is consistent screening. At signing, it's the lease bundle and notices. Within two weeks, it's the bond lodgement and condition report. On move-in day, it's the physical handover and the welcome conversation. Miss a step in that order and you're usually the one left explaining the gap to SACAT, not the tenant.
How do you screen tenants and check applications properly?
Screening only works if every applicant is measured against the same yardstick, requested for the same documents, and given the same amount of time to respond. Inconsistency here is what turns a rejected application into a discrimination complaint.

From January 2026, standard residential tenancy applications in South Australia should use Form A1 where applicable, with limits on what documents you can request. Under Residential Tenancies Regulations 2025 reg 8, generally you cannot request more than two identity documents and two supporting documents relating to ability to pay and suitability. Asking for more than that, or asking for documents outside those categories, puts you offside.
A workable screening sequence looks like this:
- Verify identity with two accepted documents (driver's licence, passport, Medicare card).
- Confirm income through payslips, an employment letter, or bank statements.
- Contact at least one rental referee, ideally the current or most recent agent.
- Check tenancy databases where you have a documented reason and the tenant's consent.
The SA Law Handbook is explicit that landlords must not request prescribed information beyond what's permitted, and prospective tenant information should be protected or destroyed within statutory retention windows unless the applicant consents to it being kept longer. That's not just a privacy nicety. A documented, consistent screening checklist reduces both your legal exposure and the risk of an unsuccessful applicant arguing they were treated differently to others.
Pro Tip: Keep a one-line note against every declined application (income shortfall, no verifiable referee, incomplete Form A1) so you have a defensible reason on file, not just a memory of the decision.
What lease and compliance paperwork do you need at signing?
The paperwork bundle you hand over at signing is what protects you if the tenancy ever ends up in front of SACAT. Every document in this bundle should exist in a signed, dated copy that sits in one tenancy file, not scattered across emails and text messages.
At or before the tenancy starts, provide:
- A signed copy of the lease agreement, with special terms clearly written out.
- The Section 48 notice, giving the tenant your (or your agent's) contact details in writing, as required under s48 of the Residential Tenancies Act.
- The Tenant Information Guide, which SA government guidance lists as a required start-of-tenancy document.
- The completed inspection sheet, ready for the tenant's review and signature.
- Written instructions for domestic appliances, especially anything unusual (ducted heating controllers, bore pumps, solar systems).
Where the application process used Form A1, keep that on file alongside the lease. It shows you followed the prescribed process rather than an informal one you can't defend later. A clear, plain-English lease with supporting correspondence kept in date order does more for you at a tribunal hearing than a technically correct but disorganised file. Landlords managing their own properties in suburbs like Norwood or Glenelg often underestimate how much a missing Section 48 notice or an unsigned inspection sheet can cost them when a dispute lands months later. Our guide to landlord obligations in South Australia breaks down each requirement in more depth.
How do you complete the condition report at move-in?
The condition report, or inspection sheet, is the single most important piece of evidence you'll ever produce for a tenancy. Get it wrong and every bond dispute at the end of the lease becomes a guessing game.
- Walk every room with a printed or digital inspection sheet, noting the condition of walls, floors, fittings, and fixtures room by room.
- Photograph or video everything, including carpets, blinds, oven interiors, and any existing marks or wear, with a timestamp visible where possible.
- Check against minimum housing standards, confirming the property is clean, weatherproof, and free of obvious safety hazards before the tenant takes possession.
- Record all keys, remotes, and access devices handed over, including quantities, so there's no dispute about what was supplied.
- Attach appliance instructions for anything the tenant will operate, from dishwashers to reverse cycle units.
- Get the tenant's signature on the report, ideally within the first few days of the tenancy, and keep a signed copy for your own file.
Practical SA guidance consistently points to the same lesson: completing the inspection sheet before or at move-in and keeping photographic evidence is what separates a landlord who wins a bond dispute from one who loses it on a technicality. Our inspection checklist covers room-by-room prompts if you want a template to work from.
How much is the bond and how do you lodge it?
Bond limits in South Australia are tied to weekly rent, and the bond must be lodged with the commissioner rather than held by the landlord. SA government guidance also expects landlords to offer an electronic payment option and to keep proper rent records once the tenancy starts.
Once you've collected the bond:
- Lodge it with Residential Bonds Online within the required timeframe after receipt.
- Keep the lodgement confirmation and the receipt you gave the tenant.
- Set up at least one electronic payment method and start a rent ledger from day one.
- Note the bond amount, lodgement date, and reference number in the tenancy file, alongside the condition report it protects.
Statistic Callout: Bond claims are almost always contested on the state of the property at move-in, not move-out, which is why the signed inspection sheet you lodge alongside the bond receipt is the document that actually decides the outcome.
What safety checks and appliance instructions are required?
Before handover, test smoke alarms, confirm hot water and heating work properly, and check any appliances staying with the property. SA guidance expects minimum housing standards to be met and written appliance instructions provided at the start of the tenancy.
- Test smoke alarms and record the test date.
- Confirm hot water, heating, and cooling systems function correctly.
- Provide manuals or plain instructions for dishwashers, ovens, and heating controllers.
- Note whether the property sits on an embedded network or shared meter, and explain who bills for what.
- Assign a completion date to any outstanding safety task and follow up before move-in.
What happens on move-in day?
Move-in day is where paperwork becomes a lived experience for the tenant, and first impressions here shape how the tenancy runs for years.
- Hand over the signed lease, keys, gate remotes, and any parking permits, counted and noted against the inspection sheet.
- Provide emergency and maintenance contact details, including the service address required under the Section 48 notice.
- Give a short welcome pack covering bin collection days, utility connection tips, and who to call for repairs.
- Walk through the property together, showing how heating, hot water, and any security system work.
A welcome pack can be as simple as one page: contact numbers, bin night, wifi router location if supplied, and a line noting where the smoke alarms are. If space is tight for a tenant moving interstate or overseas, mentioning a service like StorageNest's rental storage options in your welcome information is a small, practical touch that costs you nothing to include.
Pro Tip: Send the welcome message the evening before move-in, not the morning of. Tenants who know what to expect the night before settle in faster and call with fewer questions on day one.
How do you handle communication and inspections after move-in?
The first week sets the tone. Check in by day three or four to confirm utilities are connected, the hot water works as expected, and nothing was missed on the inspection sheet.
- Follow up within the first week and resolve minor issues before they compound.
- Schedule the first routine inspection around six to eight weeks in, giving proper notice each time.
- Log every maintenance request with dates, descriptions, and resolution notes.
- Keep inspection reports and repair logs in the same tenancy file as the lease and bond records.
Landlords who communicate consistently in the early weeks see fewer disputes later, largely because small issues get fixed while they're still small. A tenant who feels heard in week one rarely becomes a tenant who escalates in month six.
HOSO perspective: SACAT-ready onboarding practices
Every dispute we've reviewed at SACAT hearings comes back to the same weakness: a gap in the paper trail. A poorly completed Section 48 notice, an unsigned inspection sheet, or a bond receipt with no matching lodgement confirmation.
The fix is a single, central tenancy file, kept from the first application:
- Timestamped photos from the condition report, stored with the file, not just on a phone.
- A message archive covering every material conversation with the tenant.
- Receipts and lodgement confirmations for the bond, filed alongside the lease.
- The signed Section 48 notice and Tenant Information Guide, dated and matched to the tenancy start date.
This is the difference between walking into SACAT with a folder that answers every question and walking in with a memory of what you meant to do. For landlords wanting SA-specific templates, our guides on rental application approval and Adelaide rental compliance requirements cover the forms in more detail.
Why onboarding quality protects the whole portfolio
Onboarding done properly is the cheapest risk management a landlord ever buys. Tenants who move into a clean, well-documented property with clear expectations tend to stay longer and raise fewer disputes.
For busy owners, the shorthand is simple: one checklist, one tenancy file, followed the same way every time. That consistency is what makes a portfolio SACAT-ready before you ever need it to be.
— HOSO
How HOSO Real Estate handles onboarding and compliance for you
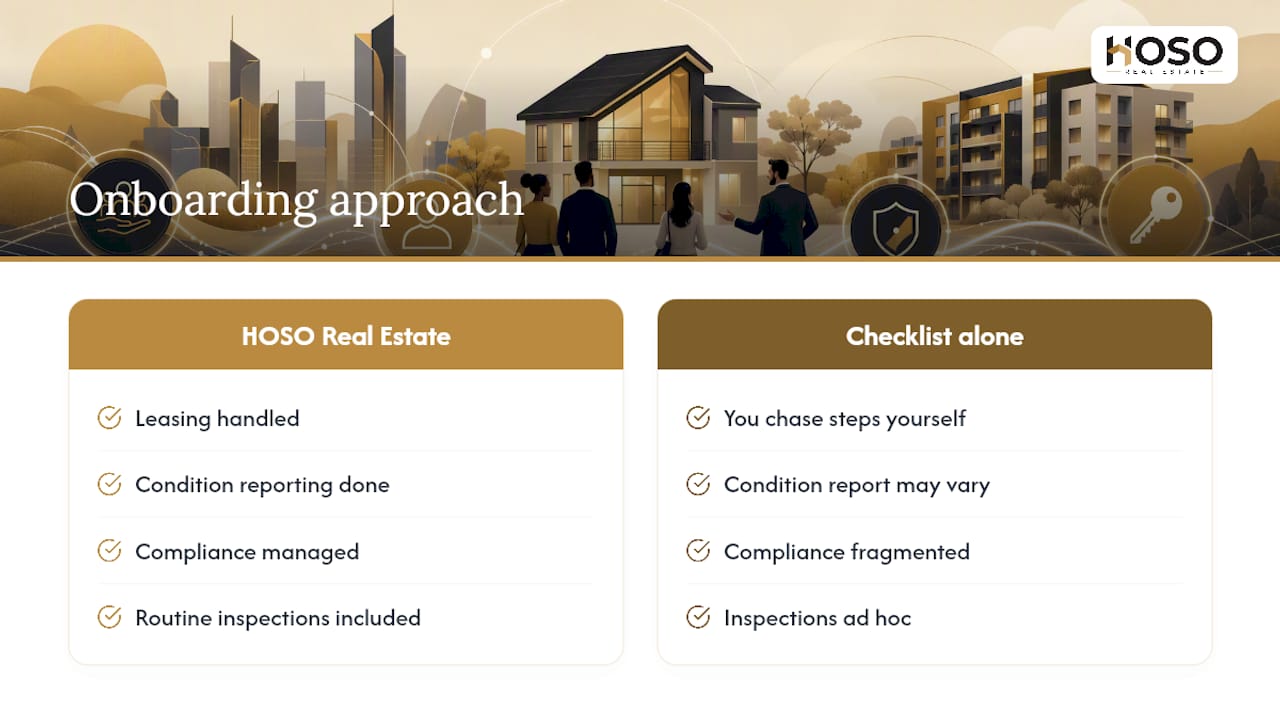
Getting every step of the tenant onboarding process right, screening, lease notices, bond lodgement, and a properly signed condition report, takes hours most landlords don't have, especially if you're managing a property from interstate or overseas. HOSO Real Estate is built around exactly this work: leasing, condition reporting, compliance management, and routine inspections handled as a single coordinated process rather than a checklist you're chasing alone.
Every tenancy HOSO Real Estate places comes with a documented file, signed reports, and consistent follow-up, the same standard of recordkeeping this article has walked through. You can see the calibre of tenants and outcomes on our recently leased properties page, or explore the full scope of our property management and leasing services to see what a properly managed onboarding process looks like from the start. If your portfolio needs a higher tier of oversight, HOSO Sovereign offers a private estate office model for owners with more complex holdings. Get in touch to have your next tenancy onboarded properly, from screening through to the first inspection.
Sources
For the primary documents referenced throughout this checklist, go directly to the source:
- RESIDENTIAL TENANCIES ACT 1995 - SECT 48
- RESIDENTIAL TENANCIES REGULATIONS 2025 - REG 8
- Offering premises for rent, prospective sale and prospective tenant information