
Before you hand over keys, complete a pre-tenancy condition report and fix any safety or minimum-standard failures, including smoke alarms, doors that unlock from inside without a key, and functioning sanitation. Photograph every check as you go. Once the property meets minimum housing standards and the paperwork is signed, you're ready to welcome a tenant.
TL;DR:
- External checks must include clearing gutters, fixing lighting, trimming vegetation, and inspecting fences and pool fences for safety and compliance.
- Inside assessments require verifying window operation, inspecting for damp or mold, and ensuring floors and fixtures are in good condition with proper documentation.
- Plumbing and sanitation need thorough testing of toilets, taps, appliances, and drainage systems, with any faults repaired before tenancy begins.
- Electrical and fire safety systems, including smoke alarms and circuit testing, must be properly documented, with alarms replaced at or after ten years of service.
- All outdoor amenities, boundary structures, and safety features like pool gates and mailboxes should be checked, photographed, and recorded to support future disputes.
Table of Contents
- What does a rent ready checklist need to cover outside the property?
- Inside: room-by-room checks for windows, walls, floors and fittings
- Plumbing, bathroom and kitchen checks before you list
- Electrical, heating and smoke alarm compliance: tests and recordkeeping
- Locks, keys and egress: getting this rule right matters
- Final handover: inspection sheet, documents and welcoming your tenant
- Checklist for safety compliance specific to local rental laws
- Guidance on documenting and photographing pre-existing damage
- Checklist for appliances: condition and functionality
- Pest control measures and checks before tenancy
- Checklist for outdoor amenities: fences, pools and mailboxes
- HOSO perspective: why a rent-ready routine protects your asset
- Let HOSO handle your pre-tenancy readiness and handover
- Official forms and legislation to keep with your condition report
- Sources
- FAQ
What does a rent ready checklist need to cover outside the property?
Exterior condition sets the tone before a tenant even reaches the front door, and it's where trip hazards and drainage faults hide until someone gets hurt or a wall goes damp.
Start on the roof. Check gutters for blockages and look for staining on ceilings or subfloor timber that signals a slow leak. Water tracking under a house in Salisbury or Modbury clay soil can take months to surface as a problem tenants complain about, by which time the damage is structural.
Work down from there:
- Clear paths and steps of cracked pavers, loose bricks, and anything a tenant could trip on in the dark.
- Fit or repair external lighting at entry points. Poor lighting at a front door is a common tenant complaint and an easy fix.
- Cut back overgrown vegetation that touches the roofline, blocks pathways, or creates cover for rodents.
- Remove builders' rubbish, old furniture, or garden waste left from a previous tenancy.
- Test every external door latch and confirm sightlines from inside to the entry point.
Pro Tip: Walk the exterior at dusk before your final inspection. Lighting gaps and shadowed steps that look fine at midday become obvious once the sun drops.
Inside: room-by-room checks for windows, walls, floors and fittings
Interior habitability comes down to ventilation, cleanliness, and repair, and it's the section landlords rush most often because damage hides behind furniture or paint.
- Windows and flyscreens. Open and close every window to confirm the mechanism works, then check each habitable room has an operable flyscreen. Many landlords overlook this, yet minimum standards expect at least one working flyscreen per habitable room.
- Mould, damp and plaster. Inspect ceilings, corners, and skirting for damp patches, cracked tiles, or blown plaster. Repair what you can before tenancy starts and photograph anything you're scheduling for later.
- Floor coverings. Deep clean or replace carpet that's stained, torn, or holds odour. Secure loose floorboards, especially in older Unley or Prospect character homes where timber movement is common.
- Cosmetic defects. List and photograph scuffed paint, chipped skirting, or worn handles. These won't fail a compliance check, but documenting them protects you if a tenant later disputes what condition the property was in.
Pro Tip: A photo taken through an open flyscreen, showing both the mesh and the working latch, settles ventilation disputes before they start.
Plumbing, bathroom and kitchen checks before you list
Sanitation failures are one of the fastest ways to breach minimum housing standards, and they're often invisible until someone actually runs the tap.
Flush every toilet in the property, not just the main bathroom. Run every tap and shower long enough to confirm hot water arrives and drainage clears without backing up.
- Test the kitchen cooktop and oven across all elements and temperatures, and confirm the rangehood or exhaust fan extracts properly.
- Check laundry taps and the washing machine's discharge pipe are connected and draining correctly.
- Run dishwashers through a short cycle if one is included, checking for leaks underneath.
- Note any tap that runs hot slowly, any drain that gurgles, or any fitting that works but feels unreliable, and schedule the repair rather than hoping it holds.
Intermittent faults are the ones that generate maintenance calls three weeks into a new tenancy. Fix them now, while there's no one living with the inconvenience.
Electrical, heating and smoke alarm compliance: tests and recordkeeping
Electrical and fire safety systems are where South Australian landlords most often fall short of minimum housing standards, and it's also the easiest category to document properly if you build a habit around it.
- Test every power outlet and light circuit, and confirm the switchboard has a residual current device (RCD) fitted, or a current test sticker if one is already installed.
- Run heating and cooling systems through a full cycle rather than just switching them on and off.
- Test each smoke alarm individually, not just one in the hallway, and photograph the result immediately after.
- Record the manufacture date printed on each alarm's casing. Replace any unit at or beyond its typical ten-year service life rather than relying on a fresh battery to buy time.
Since 1 July 2024, South Australian landlords must ensure the property meets minimum housing standards at the start of every tenancy, with breaches risking penalties up to $25,000 and an expiation fee. A simple habit covers you here: photograph the alarm face showing the test result, then photograph the manufacture date, and file both in a dated folder for that tenancy before the keys change hands.
Locks, keys and egress: getting this rule right matters
Door hardware is a compliance trap many landlords don't see coming, because a lock that seems perfectly secure can still fail the rule that matters most.
- External locks. Every external door must lock from outside with a key but unlock from inside without one. A deadlock requiring an internal key to exit is a common non-compliance, and the fix is usually straightforward: replace it with a snib-operated mechanism so anyone inside can exit without hunting for a key in an emergency.
- Key numbers. Count every key and remote you're providing, from front door to garage remote, and record the exact number on the inspection sheet.
- Secondary structures. Check locks on pools, garages, and sheds separately, and supply the matching key sets for each.
Pro Tip: Photograph the snib mechanism after replacement and note the change in the condition report. If a dispute ever reaches SACAT, that single photo answers the question before it's asked.
Final handover: inspection sheet, documents and welcoming your tenant
The handover is where all your earlier work either holds up as evidence or falls apart under scrutiny, so treat this step with the same care as the physical repairs themselves.
- Complete and sign the inspection sheet with the tenant present, then provide them a copy on the day. This document is the best available record of the property's condition at tenancy start, and it's what SACAT will look for first if a dispute ever arises.
- Photograph every item referenced on the sheet, particularly smoke alarms, locks, and any pre-existing damage, and timestamp the images.
- Hand over required information brochures, emergency contact details, and a full set of keys and remotes matching what's recorded.
- Record meter reads for water, electricity, and gas on the day of handover, not before.
- File the signed sheet and every photo in a single named folder for that tenancy. Our guide to property condition report best practices covers how to structure that record so it holds up months or years later.
Checklist for safety compliance specific to local rental laws
South Australia's minimum housing standards set the baseline for what "safe" actually means at tenancy start, and they extend well beyond smoke alarms into areas landlords sometimes treat as optional.
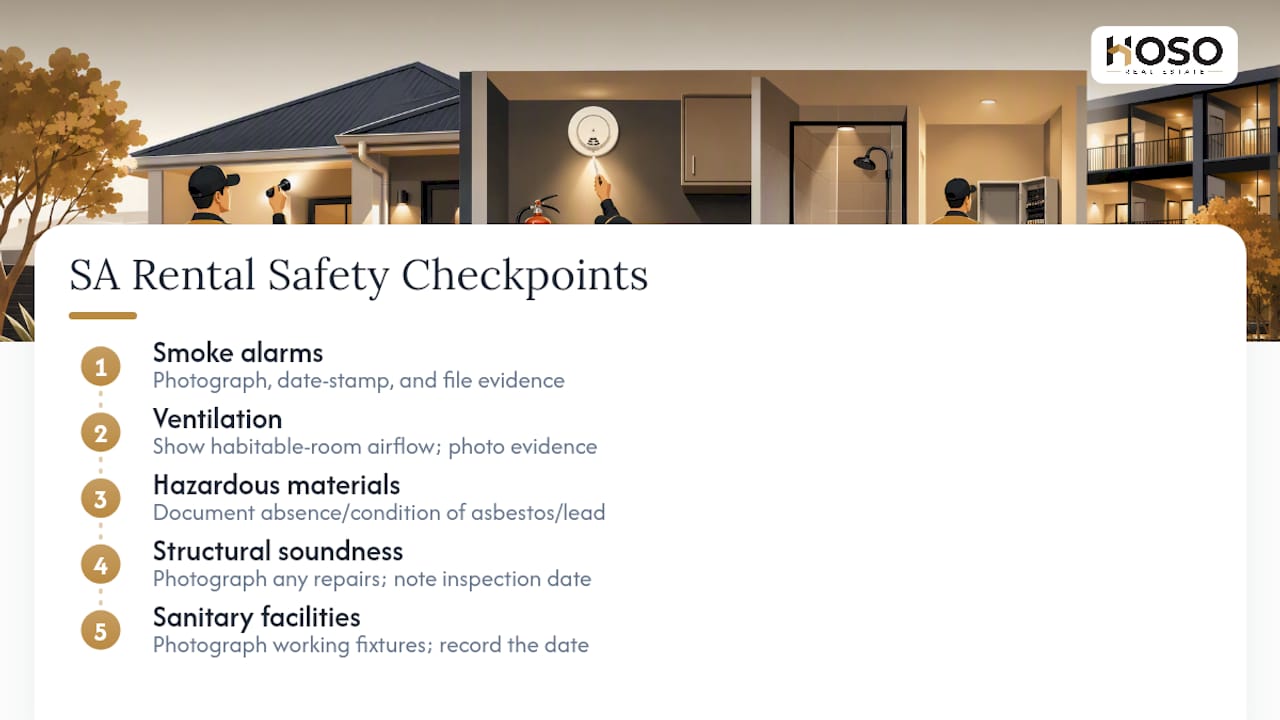
Every rental must have functioning smoke alarms in the required locations, adequate ventilation to habitable rooms, and freedom from hazardous materials such as loose asbestos or lead paint in poor condition. Structural soundness and working sanitary facilities round out the core requirements the Housing Safety Authority enforces.
Window safety devices matter for any property with upper-floor windows accessible to young children, even though South Australia doesn't mandate window guards the way some jurisdictions do for multi-storey rentals. Where a window opens onto a drop, a simple opening restrictor is a sensible addition regardless of strict legal minimums, and it's the kind of proactive fix that separates a well-managed property from one that merely scrapes past compliance.
Carbon monoxide detection isn't currently a blanket requirement across South Australian rentals, but any property with gas heating, a gas hot water system, or an enclosed garage sharing walls with living space should have one fitted as standard practice. Gas appliances also need a current safety check, and any property with a solid fuel heater needs its flue inspected before the colder months.
Document each of these checks the same way you document smoke alarms: photograph the device, note the date, and file it. A landlord who can produce dated evidence of every safety system wins any dispute before it starts.
Guidance on documenting and photographing pre-existing damage
Every scuff, stain, and worn edge that already exists needs a photo before a tenant moves a single box in, because the alternative is a dispute over who caused what, months down the track.
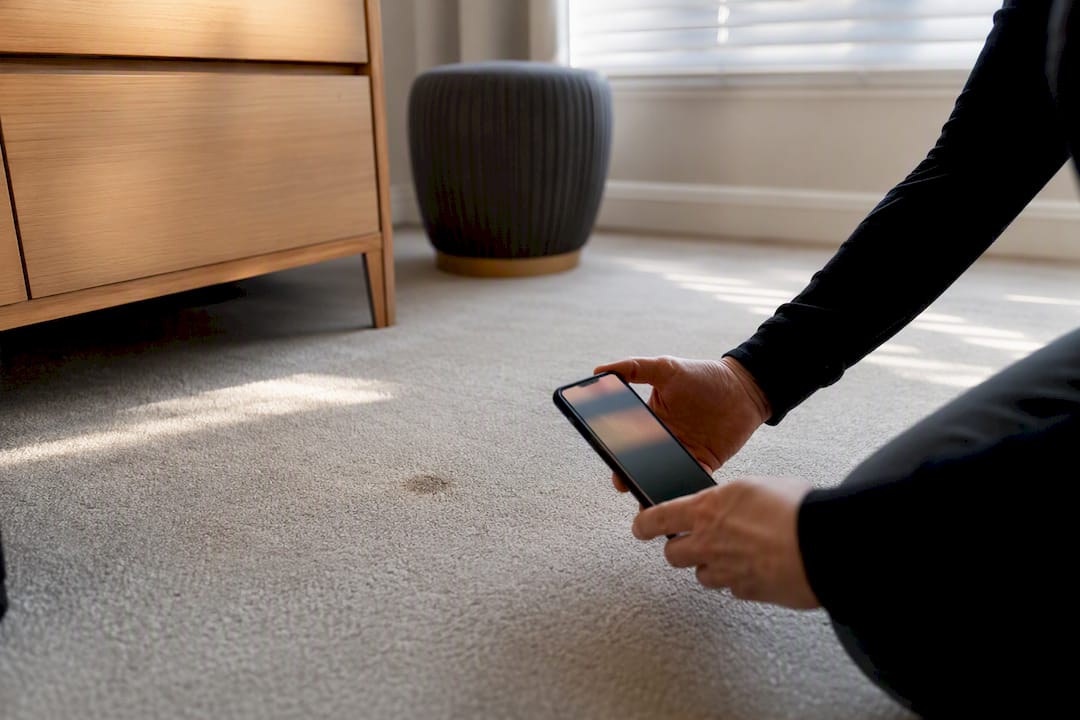
Work through the property systematically, room by room, and photograph in good natural light wherever possible. A carpet stain photographed under a single dim ceiling light is easy for a tenant to argue looks different from the "before" you're claiming, so open the blinds first. Include a wide shot of the whole room alongside a close-up of the specific defect, so context and detail both survive if the image is viewed later without explanation.
Cross-reference every photograph against the corresponding line on the inspection sheet. A photo with no matching condition-report entry is weak evidence; a photo tied directly to a dated, signed document is close to unarguable. Note the exact wording you use on the sheet, too. "Minor scuffing to skirting, hallway" reads very differently to a tribunal member than a vague "some marks."
Timestamp everything, either through your phone's native metadata or by including a dated note in frame. If you're using a property manager, ask what system they use to store and retrieve this evidence, because a folder buried in an old phone's camera roll is no use twelve months later when a bond dispute lands at SACAT.
This habit protects tenants as much as landlords. A tenant who moves in on a documented, photographed condition report can't be unfairly blamed for damage that was already there, and a landlord with the same record can't be unfairly blamed for damage a tenant caused.
Checklist for appliances: condition and functionality
Every appliance included in the tenancy needs to actually work on day one, not just look clean, and testing each one properly takes less time than the maintenance call you'll get if you skip it.
Open the refrigerator and freezer and confirm both reach a safe temperature over several hours, not just that the compressor hums when switched on. Check door seals for gaps that let cold air escape, since a failing seal often shows no obvious sign beyond a slightly higher power bill the tenant will eventually notice and complain about.
Run the stove and oven through every element and every temperature setting, including the grill if fitted. A single dead hotplate is easy to miss if you only test the front burner.
Washing machines and dryers need a full cycle test, not a quick spin. Check the washer drains completely and the dryer actually heats, since a dryer that tumbles but doesn't warm up will run for an hour and leave clothes just as wet as when they went in. Confirm the dishwasher, if included, drains fully and the door seal isn't perished.
Note the age and condition of each appliance on the inspection sheet, alongside the tenant's acknowledgement that it was tested and working at handover. If an appliance is older and likely to fail within the tenancy, decide now whether to replace it before a tenant moves in or budget for the repair call that's probably coming.
Pest control measures and checks before tenancy
An empty property between tenancies is exactly when pests establish themselves, so a pre-tenancy pest check belongs on every rent-ready list, not just the ones for older homes.
Inspect roof voids, subfloors, and around external wall bases for signs of termite activity, particularly in established suburbs like Burnside, Malvern, or Glenelg, where older homes and mature trees create the conditions termites favour. Look for mud trails, damaged skirting, or timber that sounds hollow when tapped.
Check kitchen and laundry cupboards for signs of cockroach or ant activity, especially around plumbing penetrations where pests find easy entry points. Inspect roof spaces and eaves for evidence of possums or birds nesting, which is common in leafier pockets of Adelaide and can cause real damage to insulation and wiring if left.
If the property has sat vacant for an extended period, a professional pest inspection before the tenant moves in is worth arranging, particularly for houses with established gardens or timber subfloors. Treating an infestation before handover is far simpler than trying to manage it once a tenant is living in the property and pests have had a full season to spread.
Note any treatment carried out, including the date and the areas covered, on the inspection sheet or in an attached document. If a pest issue emerges during the tenancy, that record shows whether it was pre-existing or developed afterward, which matters if the question of responsibility ever comes up.
Checklist for outdoor amenities: fences, pools and mailboxes
Boundary and shared-use structures carry their own safety obligations, and they're easy to overlook because they sit outside the main structure most checklists focus on.
Walk the full fence line and check for leaning posts, broken palings, and gates that don't latch securely, particularly where the fence borders a neighbouring property or a public footpath. A fence that looks fine from a distance can still have a post rotted through at ground level.
If the property has a swimming pool, confirm the pool fence and self-closing, self-latching gate meet current requirements, and test the gate mechanism yourself rather than assuming it still works from the last inspection. Pool safety compliance is checked separately from general minimum housing standards, and a faulty gate latch is one of the most common failures inspectors find.
Check the mailbox is secure, legible, and correctly numbered, since a missing or unclear mailbox creates ongoing friction for a new tenant trying to redirect mail and services. Confirm letterboxes on shared driveways or strata-titled properties are clearly allocated.
Inspect clotheslines, garden sheds, and any external storage for stability and safe operation. A rotary clothesline with a rusted, seized winding mechanism is a small thing until a tenant reports it as their first maintenance request in week one. Photograph each of these features as part of your standard handover documentation, the same way you would an internal fixture.
HOSO perspective: why a rent-ready routine protects your asset
Most landlords treat pre-tenancy checks as a formality. We treat them as asset protection. A property that passes a genuine condition assessment, not a rushed walkthrough, attracts better tenants, generates fewer maintenance calls, and holds its value across a longer hold period.
Our approach centres on documented checks and SACAT-ready condition reports, because a dispute avoided is worth more than a dispute won. One habit changes outcomes more than any other: timestamped photos filed against a signed inspection sheet. That combination cuts dispute risk sharply, and it costs nothing but discipline.
— HOSO
Let HOSO handle your pre-tenancy readiness and handover
Running a full rent-ready process on top of everything else an investment property demands is where most landlords lose time, and where small compliance gaps quietly turn into disputes later. HOSO Real Estate manages the entire pre-tenancy sequence for Adelaide landlords: the inspection, coordination of any compliance remediation a property needs, and a fully documented, SACAT-ready condition report handed over with the keys. That means no chasing tradespeople between listings, no guessing whether your smoke alarms or door hardware meet current standards, and a professional handover record sitting in your file from day one. If you'd rather your next tenancy started with certainty than paperwork, explore our property management services and let us take the pre-tenancy work off your plate.
Official forms and legislation to keep with your condition report
Keep these on file alongside your signed inspection sheet:
- Residential Tenancies Act 1995 (SA) for the legal minimum standards and penalty framework.
- CBS inspection sheet as the standard condition report form.
- Housing Safety Authority minimum standards for detailed compliance criteria.
- Tenancy reforms overview, including the Form A1 application requirement.
Sources
- Residential Tenancies Act 1995 (SA)
- Inspection sheet — Consumer and Business Services (SA)
- Minimum housing standards — Housing Safety Authority (SA)
- Tenancy reforms for landlords and agents — CBS (SA)
FAQ
What is a rent ready checklist?
It's the full set of inspections, repairs, and documentation a landlord completes before a tenant moves in, covering safety compliance, appliance function, cleanliness, and the signed inspection sheet.
What are the legal minimum standards for a rental in South Australia?
Minimum housing standards require structural soundness, working smoke alarms, functional sanitation, adequate ventilation, and freedom from hazardous materials, with breaches risking penalties up to $25,000.
Do I need to photograph the property before a tenant moves in?
Yes. Timestamped photographs matched to the inspection sheet are the strongest evidence available if a condition dispute reaches SACAT.
How do I know if my smoke alarms are compliant?
Test every alarm individually, photograph the result, and check the manufacture date on each unit. Replace any alarm at or beyond its typical ten-year service life.
Can HOSO Real Estate manage the rent ready process for me?
Yes. HOSO Real Estate coordinates pre-tenancy inspections, compliance remediation, and SACAT-ready condition report handover for Adelaide landlords through its property management services.